 Humans have been baking bread since they first ground grain, made it into a paste and spread it on a hot rock. Archaeologists have found evidence of starches from plant roots and grasses, as well as rudimentary mortar-and-pestle grinding stones dating back 30,000 years. When the hunters and gatherers figured out how to grind grains and make them into a gruel, it was a short jump to spread the paste onto a hot rock and transform it into an entirely different type of foodstuff.
This very thin, cracker-like substance is a far cry from what today’s culture considers bread, but it is still a staple of many indigenous cultures around the world.
Hopi piki bread, Mexican tortillas, Jewish matzo and Ethiopian injera are all examples of unleavened breads, baked on a hot stone or griddle. These traditional early breads made it possible to store grain in an edible form over the winter and were portable enough to carry from place to place as people followed the seasons and animal migrations or as they escaped enemies.
 Fortunately, in today’s world, you don’t have to forage for grains nor grind them between two pieces of rock. You have access to nearly every grain imaginable everywhere in the world and all sorts of appliances to mill them into flour, should you wish to do it yourself.
Old, previously closed flour mills are reopening globally, and many are choosing to grind ancient types of grains. Some mills are grinding organically grown grains exclusively, as public sentiment is leaning toward a cleaner, greener lifestyle.
The Return of Home Baking
A resurgence in home bread-baking has been gaining momentum for a couple of decades as the population has become more aware of the artisan bread aesthetic. Flavorful, crusty loaves offered at bakeries, farmers markets and the gourmet sections of grocery stores have won the favor of those who prefer a handmade-style bread over the more industrialized, cello-wrapped, squishy loaves commonly offered.
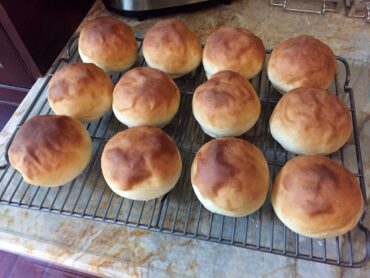 The ongoing COVID-19 pandemic, requiring people to stay at home as much as possible, resulted in many consumers stockpiling staple supplies such as flour and yeast. Home bread- baking has emerged as a worthwhile and satisfyingly popular pastime — as evidenced by the sudden shortage of flour and grains on grocery store shelves.
Olalla resident Jeff Stelmach added bread baking to his vast culinary repertoire when he found himself confined at home during the pandemic. Stelmach has baked a wide variety of quick breads for years, but had not dabbled in the world of yeast-risen dough.
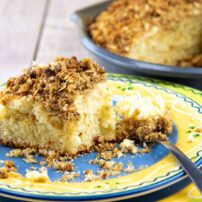
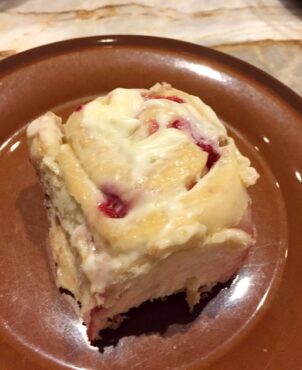
 Discovering a packet of yeast in the back of the cupboard, and having all the other ingredients necessary on hand, he mixed up a batch of raspberry rolls. Encouraged by his successful foray into yeast baking, he set about on a quest to secure yeast and flour, both in short supply during the early days of the pandemic.
Armed with yeast purchased online and a large 25-pound bag of all-purpose flour from Costco in his pantry, Stelmach set out to master bread baking. He has not purchased any baked goods from the market since, and is enjoying the satisfying process of baking for his home use.
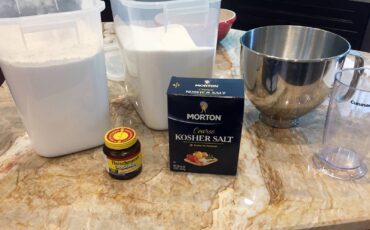 “One thing I would say to anyone wanting to start baking bread is to not give up if your first attempts are less than successful,” he says. “Practice makes perfect.”
No Kneading Required
A few years ago, food writer Mark Bittman interviewed Jim Lahey, founder and owner of the Sullivan Street Bakery in New York City. Bittman and Lahey demonstrated how an artisan-style, crusty, flavorful loaf could be produced by nearly everyone, with little or no kneading.
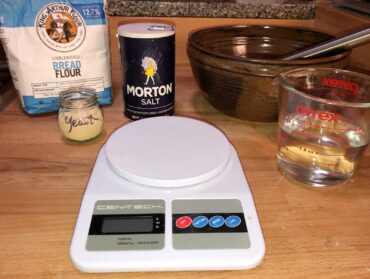
No kneading? This technique previously was almost unheard of, and was confounding to the traditional bread bakers of the country. Since then, food blogs, YouTube tutorials and photos of freshly baked loaves on social media have snowballed into an avalanche of information and instruction on home bread-baking.
The secret to a hands-off, “no-knead” recipe is time. The dough is mixed up the night before baking, left to sit and ferment at room temperature, then simply stretched and folded, and allowed to rise again before baking in a heated pot or on a stone. The entire process is illustrated in Lahey’s book, “My Bread.”
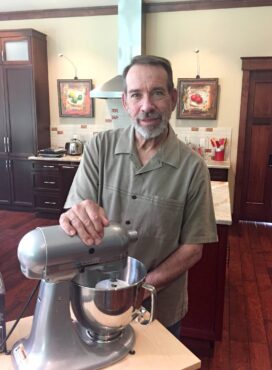
This long fermentation technique was mentioned in Michael Pollan’s “Cooked.” In his book, he explains the evolution of grains and flours and industrialized baking. He illustrates the health issues involved with extracting nutrients from flours grown in depleted soils, and the addition of chemicals to the commercial bread-baking processes.
Pollan argues that it’s possible the digestive issues many people attribute to wheat gluten sensitivities could be due to the rapid-rise technique necessary to turn out thousands of loaves daily. When flour, water, salt and yeast (the only ingredients necessary to produce a lovely loaf of bread) are mixed together and allowed to sit for several hours before baking, the yeast “predigests” the grain, making it easier for human bodies to digest the rest of the way.
Of course, people have been baking bread for thousands of years, and no one has worried very much about the scientific approach to the final outcome. But baking is a chemical process, so some attention must be given to the quantities of each of the ingredients in conjunction with each other. Many experienced bakers don’t bother to measure because they are accustomed to mixing the dough simply by feel.
Breads for Every Preference
At age 15, Miriam Barnett learned to bake bread when she decided to become a vegetarian and cook meals for herself that were different from those offered at the family table. Barnett discovered the “Tasajara Bread Book,” the “bread-baking bible” of the 1970s. She became fascinated with baking yeast breads, and has not purchased bread from a grocery or bakery for several years.
Barnett has transitioned from traditional methods to slow-rise sourdough using a starter. She bakes for family needs, gives bread to friends as gifts and donates to fundraising auctions.
“Baking bread is as much art as science and provides a relaxing, creative outlet after a day at a stressful job,” she says.
Barnett prefers organic, unbleached flour, which she combines with whole-wheat or rye for flavor and nutrition.
Anne Knapp learned to bake bread in her grandmother’s kitchen. As a young bride, she found her skills at thriftiness and sustainability served her well.
 “I could bake a loaf of bread for 17 cents, including electricity, so I baked three or four loaves a week,” she says.
Knapp prefers good-quality flours from King Arthur or other organic sources. Her favorite bread book is “What You Knead” by Mary Ann Esposito, which she has had for many, many years.
Knapp has recently discovered the website “Breadtopia,” which offers recipes, bread-baking supplies, a blog and tips and techniques for the perfect loaf. She, too, is dabbling in the art of sourdough.
 Sourdough bread has captured the imaginations and the favor of home bakers, thanks to a revival in the interest of fermented foods, which are reputed to improve digestion. The sourdough process is complex and fraught with difficulties for the inexperienced baker, so the recipes in this article contain only commercial yeast. Those interested in pursuing sourdough baking may wish to check out the books and websites included in the sidebar.
Bakeries always measure by weight, rather than cup and spoon because it is a far more reliable method. Due to the moisture content in flour, some can weigh substantially more or less than others, which can cause difficulty in the final outcome of the dough. The digital scale is a very useful tool, and by weighing your flour, salt, yeast and water, you will get consistent results when you bake.
Try This at Home
The following are two separate and distinct methods for creating the perfect loaf at home. Both recipes use active dry yeast, available at grocery stores and online.
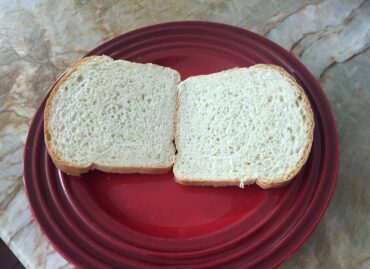
The first is a traditional, rapid-rise method accomplished in a few short hours. It will produce a loaf with a nice rise, soft crust, cake-like consistency perfect for sandwiches, toast, etc.
The second features a hands-off, no-knead technique that will result in a very crusty artisan loaf perfect for sopping up juices in the bottom of a bowl or spreading with soft cheese.
 Artisan ‘No-Knead’ Crusty White Bread
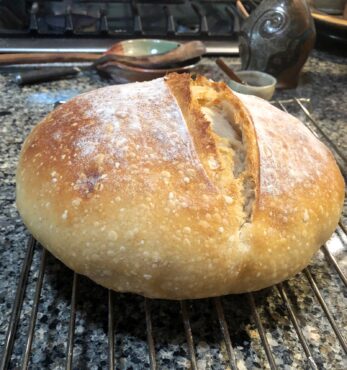
This bread is crusty and full of air holes and is reminiscent of round loaves found at specialty bakeries and farmers markets. It requires a Dutch oven for baking. Although it can be baked directly on a baking sheet or pizza stone, baking it inside a heated, closed pot is a good first step for the novice baker.
Ingredients:
• 3 cups all-purpose flour
• 1/4 teaspoon active dry yeast
• 1 1/3 cup room-temperature water
• 1 1/4 teaspoon fine sea salt
• Bran or additional flour for dusting
Instructions:
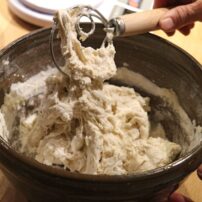
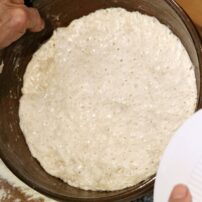
In a large bowl, whisk yeast into flour. Make a well in the center and pour water into the well. Mix thoroughly with a dough hook or your hands. Let dough sit about 20 minutes, then sprinkle salt over it. Mix well to incorporate salt. Cover with plastic wrap and let sit at room temperature overnight (12-18 hours).
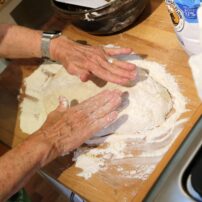
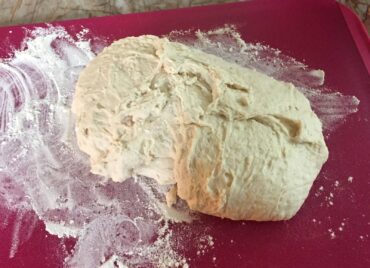
Lightly flour a work surface and turn bubbly, soft dough onto floured surface. Sprinkle a little flour over the soft dough, and gently pat it into a rough 8-by-12-inch rectangle. Lifting by two corners on the short side, fold over 2/3 way toward other end. Lift the opposite corners and fold over the first fold. Then tuck the folded edges under to make a rounded ball.
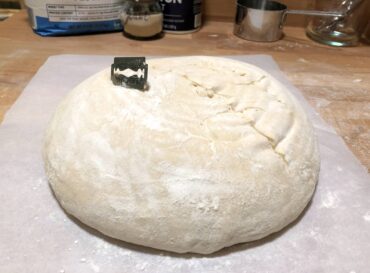
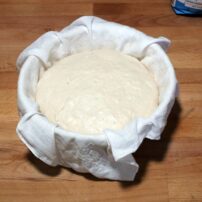
Place dough, seam side up, on a well-floured or bran-dusted tea towel, or in a bread-raising basket (banneton) with a floured liner such as a linen napkin. Dust the surface of the dough and cover with a towel and a layer of plastic for 1-2 hours until nearly double in size.
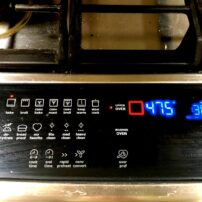
Place a 4- or 5-quart Dutch oven with a tight-fitting lid on the middle shelf in the oven. Set oven at 475 degrees.
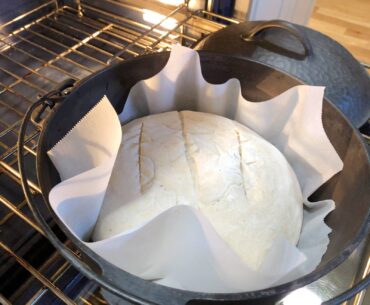
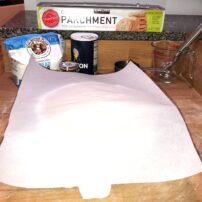
When oven reaches temperature, remove plastic and towel from dough and place a 12-by-12-inch piece of parchment over the dough. Grasping the parchment and towel or basket, quickly flip the dough over. Remove dusted towel or basket and liner. Quickly slash the surface of the dough with a very sharp knife or razor across the middle of the ball.
Remove pot from oven, remove lid and quickly lower the parchment holding the dough into the pot. Replace lid and put back into oven. Bake for 30 minutes, remove lid and leave bread in the oven for 15 more minutes. Test with instant-read thermometer in the center of the loaf, and check to see temperature has reached 200 degrees.
Remove bread from Dutch oven immediately and cool on a metal rack. Be sure to wait until bread is room temperature before cutting.
 Traditional Yeast Bread
This versatile dough can be used in a variety of ways. It is the basis for cinnamon rolls, dinner rolls, raisin bread, pizza, etc. To make a whole-wheat loaf, substitute up to 1/3 of the all-purpose flour with sifted whole-wheat or rye flour. The recipe is for sandwich loaves.
Ingredients:
- 1 tablespoon active dry yeast (a packet of yeast contains 2 1/4 teaspoons)
- 2 tablespoons white sugar
- 2 1/2 cups warm water (110 degrees)
- 2 tablespoons softened butter or vegetable oil
- 1 tablespoon salt
- 6 1/2 to 7 cups all-purpose flour
Instructions:
In a large bowl, dissolve yeast and sugar in 1/2 cup warm water. Whisk to dissolve yeast and rest until yeast is creamy. With a wooden spoon or dough hook, stir in remaining water and three cups of the flour. (May use a heavy-duty stand mixer with a dough hook if available).
Beat in butter or oil and salt. Stir in the remaining flour, 1/2 cup at a time, blending well after each addition. (Use hands if easier than a wooden spoon). When the dough has pulled together, turn it out onto a lightly floured surface and knead until smooth and elastic, about 8 minutes. If using an electric mixer, continue to knead with dough hook on medium speed an additional 6-8 minutes.
Lightly oil a large bowl, place the dough in the bowl and turn to coat with oil. Cover with a damp cloth and let rise in a warm place until doubled in volume, about 1 hour — 85 degrees is ideal. If the kitchen is cooler, the dough will take longer to double. Hint: Put in oven with just the oven light on.
When dough is double, turn it out onto a lightly floured surface. Divide the dough into two equal pieces and form into loaves. Pat dough into a rectangle about 9 by 12 inches.
Fold a short edge about 2/3 way toward the other end the rectangle. Then fold it again another third. Pinch the seam together, roll the dough over so the seam is down and plump the ends under and into a loaf to fit in the baking pan.
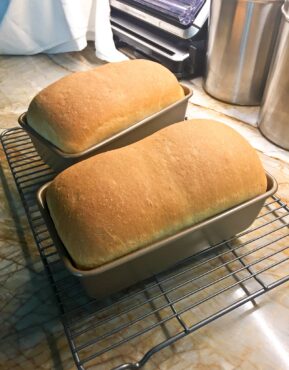
Place the loaves into two lightly greased 9-by-5-inch loaf pans. Cover the loaves with a damp cloth or plastic wrap and let rise until doubled in volume, about 40 minutes.
Preheat oven to 375 degrees.
Bake at 375 degrees for about 35 minutes or until the top is golden brown and the bottom of the loaf sounds hollow when tapped. Insert an instant-read thermometer to check and make sure the bread is at least 200 degrees. Remove from oven and immediately remove from loaf pans. Cool on a wire rack and wait about two hours before cutting.


