


 Terracotta pots are probably the most commonly used type of planter. Garden centers, nurseries, craft stores and any retailer that sells gardening supplies also carries terracotta planters. They are popular for their burnt orange color and natural look.
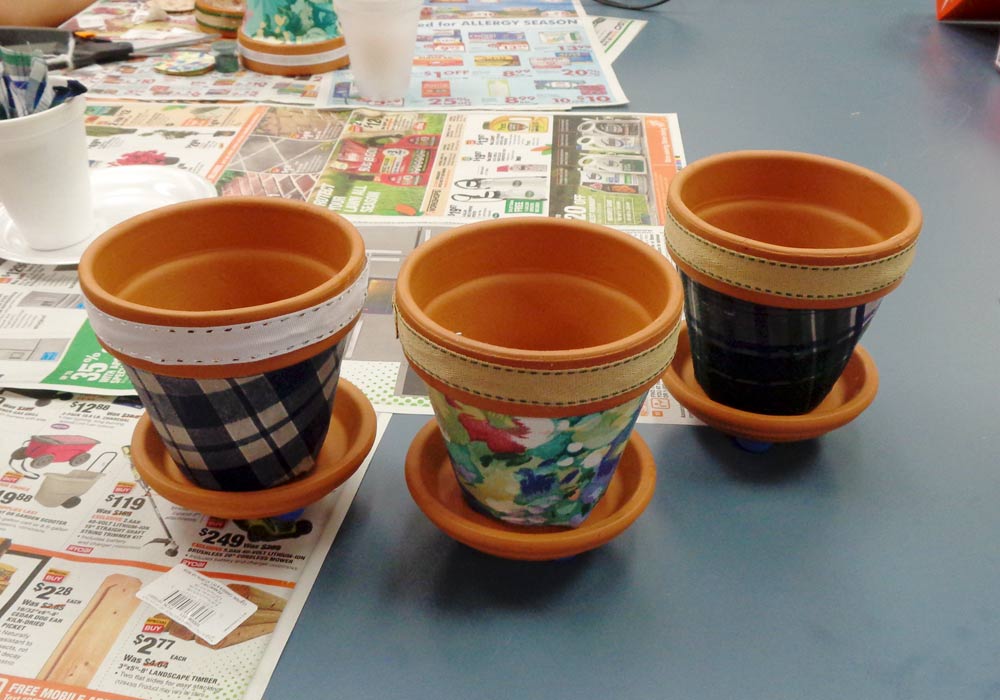
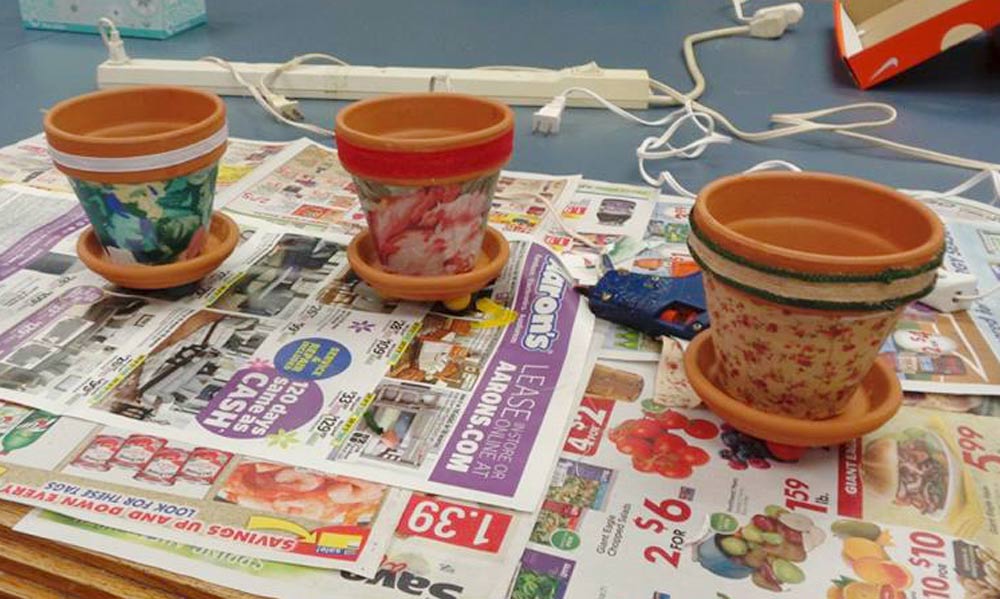
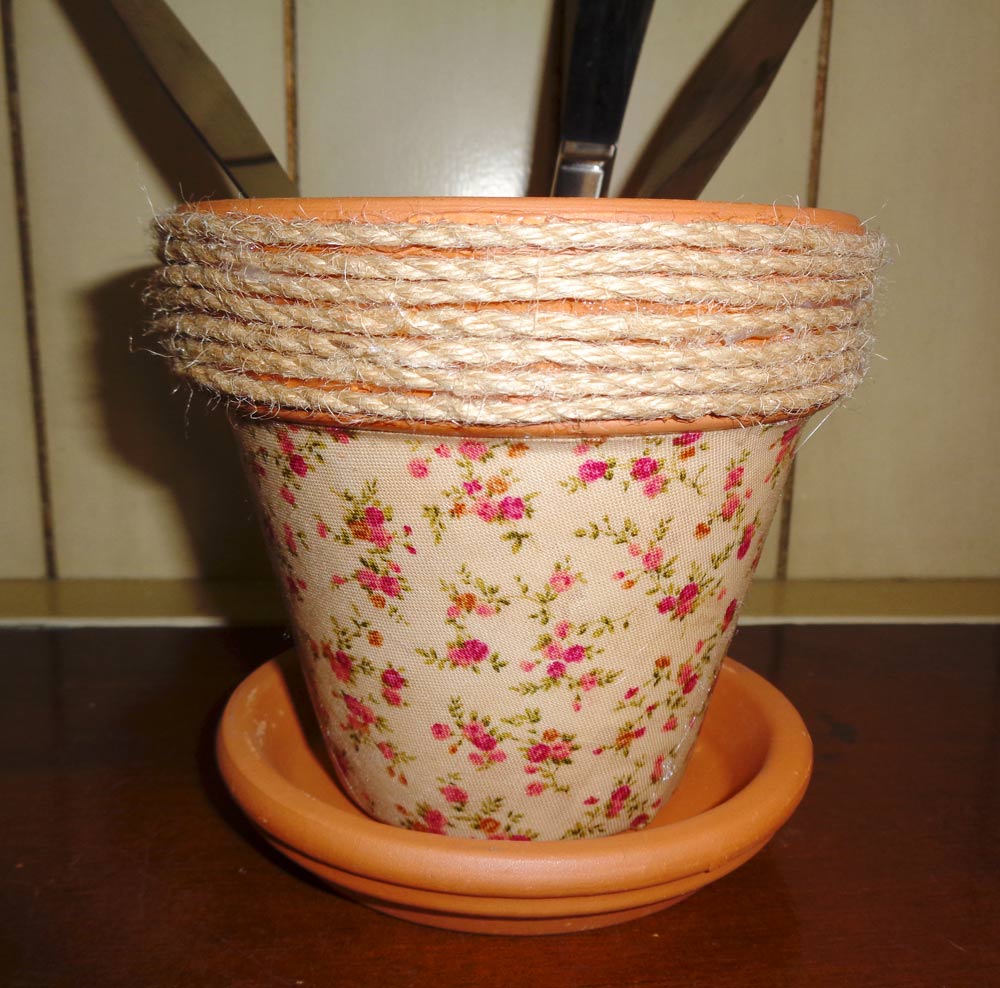
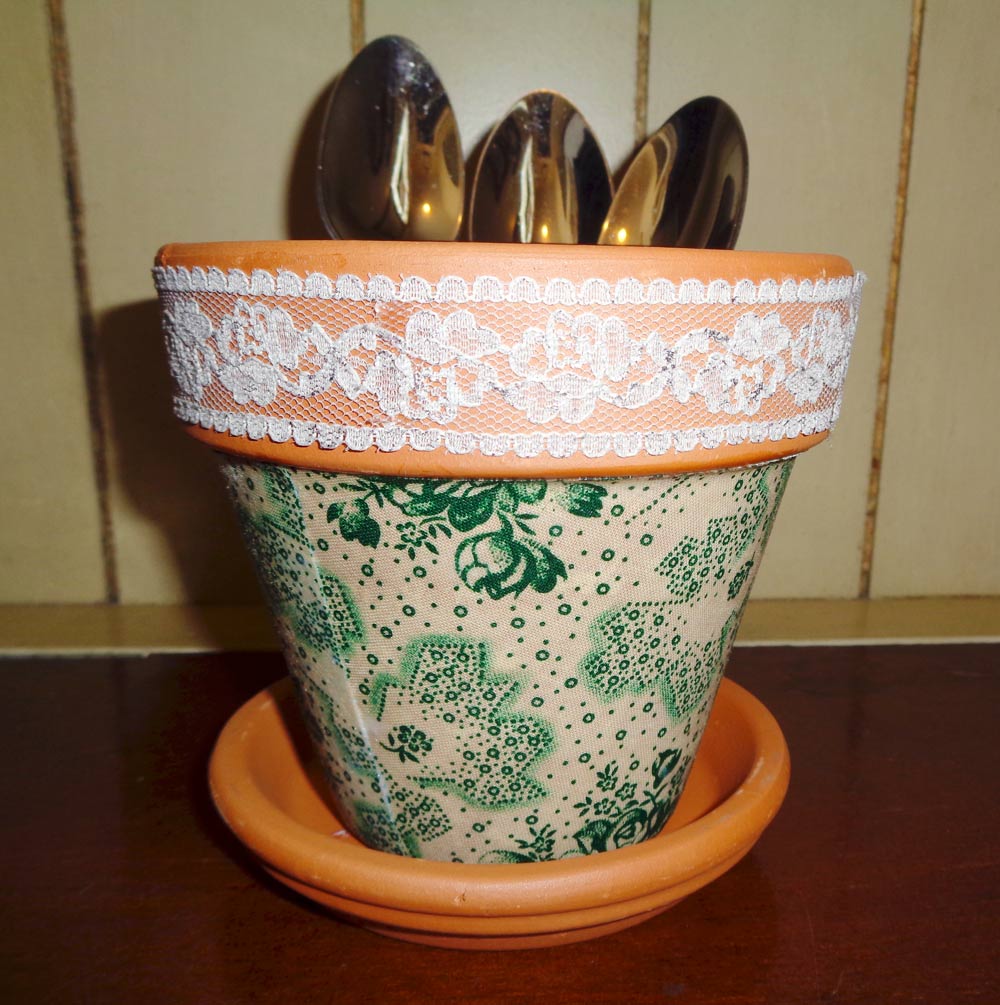
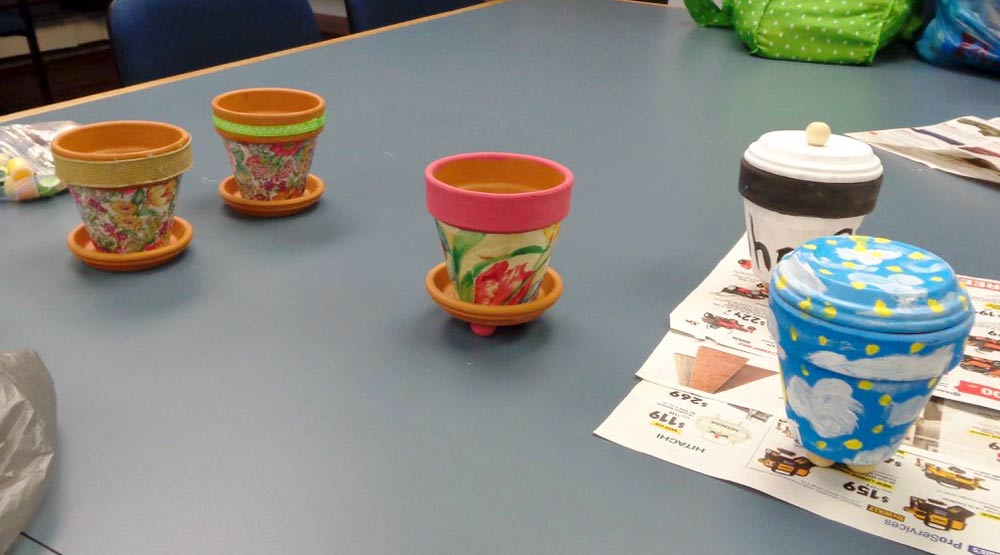
If you want terracotta but don’t want them to all look the same, you can easily transform them in about an hour. There are tutorials for this craft all over the internet, each with slightly different steps.
This tutorial only uses ribbon, fabric and Mod Podge. Before you run to the craft store, look around your house to see what supplies you already have. You might find that you have everything you need to make these cute, decorated pots to use for just about anything.
Materials needed:
- Scissors (for paper and fabric)
- Small or medium size teracotta flower pot and matching saucer
- Ribbon
- Miniature craft bows, buttons, beads or other embellishments and craft glue (optional)
- Mod Podge (use exterior Mod Podge if you plan on using your finished pot for a potted plant)
- Newspaper
- Thin, black marker
- Cotton fabric
- 4 small wooden craft balls (optional)
- Cardboard and a utility knife (optional)
Steps:
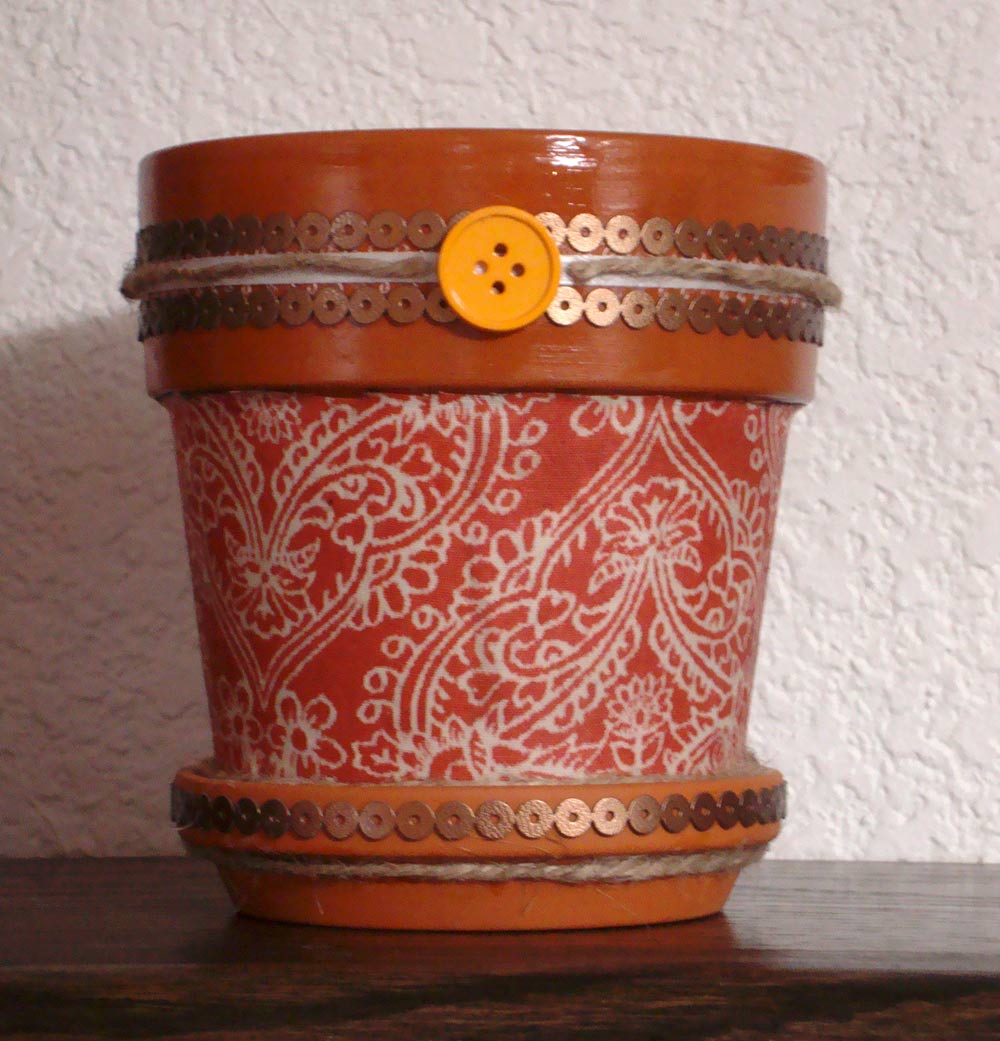
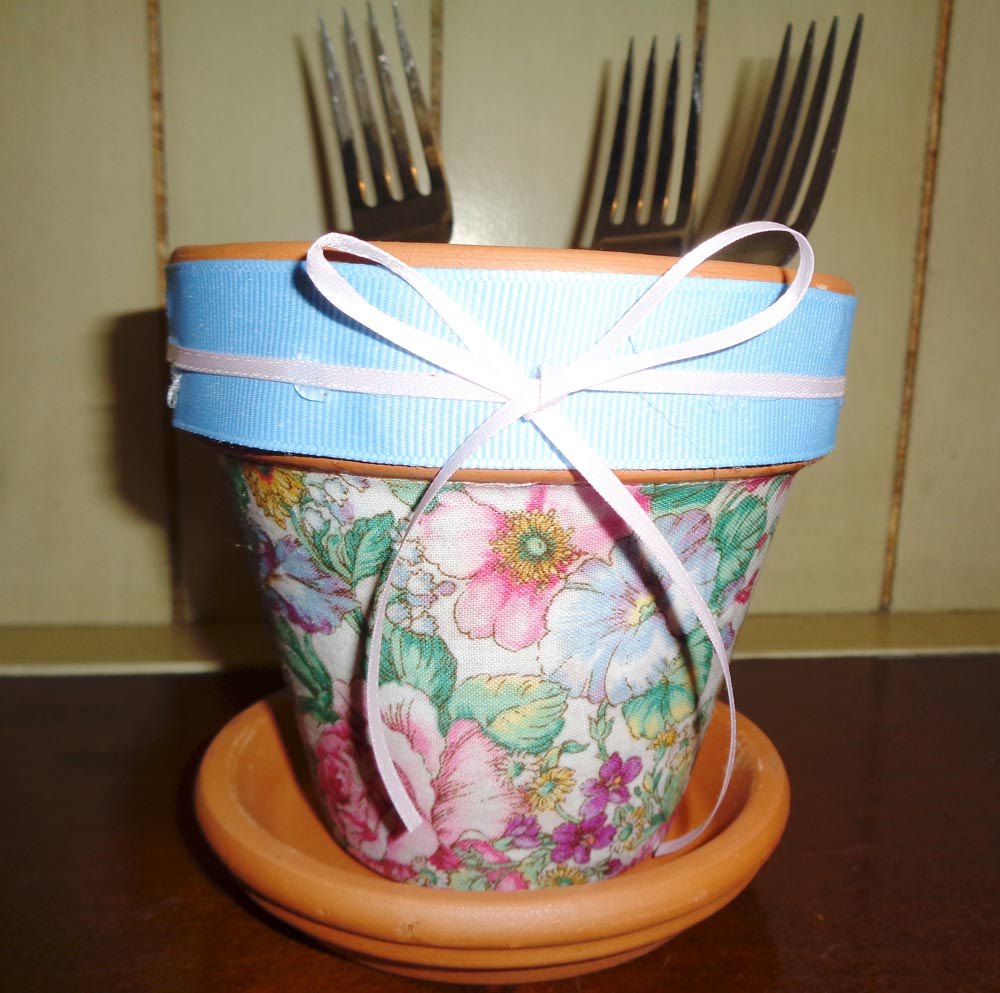
1. Decorate the outside of the rim.
Wide ribbon will cover more of the rim than thin ribbon will. Once you’ve chosen where to place the ribbon, brush a coat of Mod Podge around the rim. Then, wrap the ribbon around the rim and gently move it as needed in order to make sure it’s centered and straight.
Let it dry, and then brush a second coat of Mod Podge over the ribbon and rim.
You can also use twine or a combination or twine and ribbon. After the Mod Podge dries, you can embellish the rim with miniature craft bows, buttons, beads and other things. Attach your embellishments with a dab of craft glue. Use your imagination!
2. Make a template for your fabric.
Wrap a half sheet of newspaper around your terracotta pot, just below the rim, to make a cone shape. Overlap the edges by about a half inch.
Use your marker to trace the paper along the bottom of the pot’s rim and the bottom edge of the pot to show you where to cut the paper. You will use this template to cut out your fabric.
3. Cut your fabric.
Choose the part of the fabric you want to put on your pot, then lay the newspaper template on it, trace around it with your marker and cut out the pattern. (Some tutorials use tissue paper instead of newspaper, and they pin tissue paper to the fabric to make cutting the fabric easier).
Lay your cut fabric over your pot before applying Mod Podge to see if the fabric covers the pot correctly. In this step, you’re just cutting and testing the fabric to make sure it covers the pot correctly. You will use the Mod Podge in the next step. Trim the fabric as needed.
I allow a little bit of the terracotta color to show at the bottom of the pot rather than bringing the fabric all the way to the bottom, then wrap another piece of ribbon around the fabric’s raw edge. That allows my edge to be a little uneven since it is hard to cut fabric perfectly straight.
You can also cut the fabric long enough to wrap around the bottom of the pot, cutting a few slits to help the fabric lay flat.
4. Glue the fabric to the pot.
Brush a layer of Mod Podge onto the pot. While the Mod Podge is still wet, wrap your fabric around the pot below the rim. If you are covering the bottom of the pot, cut a few slits in the part of the fabric that will cover that part of the pot and then overlap them so the fabric lays flat.
Once the fabric is in place, brush a layer of Mod Podge over the top of the material. Let dry.
5. Prep the inside of the pot.
If you plan on using your fabric-covered pot as a container from trinkets or a pencil caddy, you’ll need to cover the hole in the bottom of the pot. Just trace the bottom of the pot on a piece of cardboard. Cut out the cardboard circle, then brush Mod Podge over the top side of it.
Lay a piece of fabric over the Mod Podge side and cut around the edge to fit it to the cardboard circle. Let dry, then press the circle into the bottom of your pot. (Skip this step if you plan on using your creation for a potted plant.)
6. Attach the saucer to the pot.
Put a few dots of hot glue on the bottom of your pot and center it on the saucer. Hot glue dries fast, so if you center it on the saucer and trace around the bottom of the pot, you will know exactly where to place it after you apply the hot glue.
7. Attach feet to the saucer.
If you are adding feet to your pot, hot-glue four wooden craft balls to the bottom of the terracotta saucer, evenly spaced, to make feet for the pot. (Tip: Large beads could also work as feet). Let dry.
This is an optional step, but if you choose not to add feet to your pot, I recommend at least putting a few self-adhesive foam pads to the bottom, or cutting a piece of foam to fit the saucer’s shape and gluing that to the bottom of the saucer. I do this to most of my flower pots and trinket jars to keep them from scratching surfaces and to help protect them from breaking if they are set down too hard.
8. Fill your decorated pot.
Now that your terracotta pot has been transformed, you can use it to hold dried flowers, pencils, keys, cotton balls, change, trinkets or other loose items that need a home.
Author Note: Special thanks to my sister, Sharon Pasquariello, for providing instructions and photos from the weekly craft class she teaches.


Comments