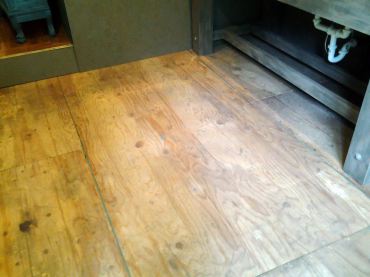
 My husband turned to me a couple of weeks ago and said, “You know that vintage area rug you’ve got downstairs in our basement studio, trying to cover up the plywood floor? I’ve always hated that. What I’d like to see down there is something more artistic, like an acid-washed concrete floor.”
So, I started calculating what we could do, and how we could get the most bang for our buck.
Since I’m a colorist and used to be a faux finish artist, my first thoughts went to color — with the use of paint. Of course!
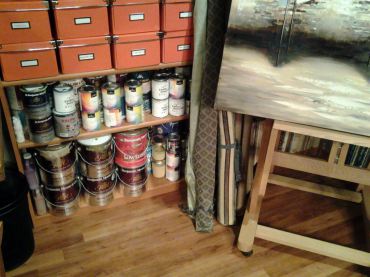
I went down to our basement studio, took a look at all of the extra cans of paint that we’ve got (which I’ve lost count of) and selected a base coat with three “acidy” colors that I would use in order to create the look that we (“The Royal We”) wanted.
Doing faux finish is not as hard as is looks. The most difficult part is getting started, and the next is creating a mindset that it will be imperfect.
But, if you can (literally) wipe down a kitchen countertop, you can absolutely create artistry with the use of faux finish. I’ve taught a lot of clients in the past, and if you can grasp the fact that faux finishing is a nonprecise form of art, you can transform floors, walls, furniture and more.
To get started, you need to clean your surface of debris, which in my case was to simply sweep and shop-vac the floor.
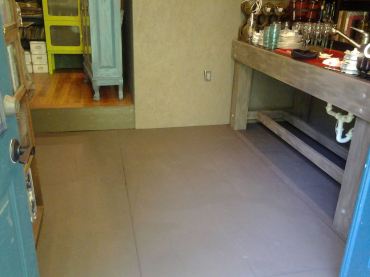
Then we’re going to paint a base coat.
I chose one of my most favorite colors, Benjamin Moore No. 1547, “Dragon’s Breath.” I don’t just love it for its name; (in my mind) it’s the perfect backdrop for the Pacific Northwest. And in this case, the perfect color of wet concrete.
This base coat should cover your floor but it’s going to be mostly painted over, so you don’t have to be too concerned with the actual coverage.
Applying the Coats of Faux Finish Color
The first coat of faux finish color (as well as all the rest of the layers) is going to be applied with a slightly dampened cloth or rag that fits comfortably in your hand. What you’ll want to do is cover between 50 and 60 percent of your base coat with pigment.
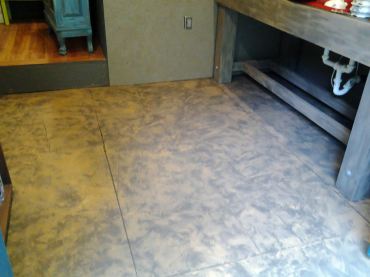
I like to rub, dab and wash the faux finish colors on when doing floors, to create some interesting, organic movement. I chose Benjamin Moore HC-7, “Bryant Gold,” for my first faux finish color because what I was going for were the “highlights” that would be peeking out through the rest of the colors once I was done.
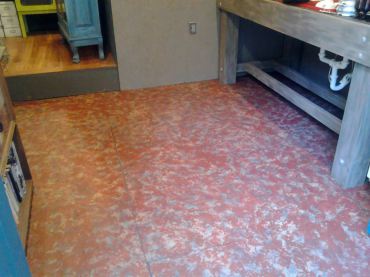
My second faux finish color was Benjamin Moore No. 2085-10, “Arroyo Red,” and was applied much like the first, covering about 60 percent or so.
This is always the nerve-racking step, as the effect we’re creating is “depth” when it’s all finished. Therefore, it’s very contrasting in terms of light to darkness. Here’s where you’ll see the difference between an amateur and a professional faux finished project: It’s all of the dimensions that one will or will not create. So, remember to press forward through this step. It might be scary, but it will be well worth it.
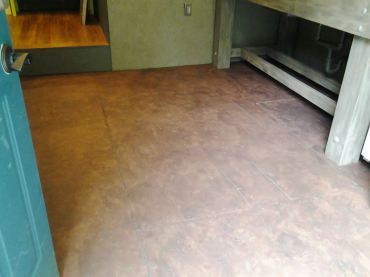
My third faux finish color was Benjamin Moore No. HC-70, “Van Buren Brown,” which is a gorgeous, deep-chocolate hue. It melded the Arroyo Red all the way down through to the Dragon’s Breath, as I hoped it would. I washed the color over the entire floor, only sometimes dabbing the pigment in places to create some shadowing.
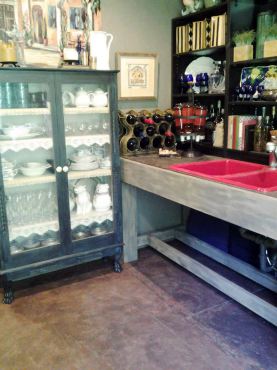
My last faux finish coat was yet another Benjamin Moore color, No. HC-103, “Cromwell Gray.” This was lightly washed again over the entire floor to give an earthly, worn look, which it did beautifully. So, there you have it.
Lastly, to protect all of my hard work, I coated the entire floor with a water-based top coat called Dead Flat Varnish. It goes on milky white and dries perfectly clear with no sheen.
And, voila!
For about $6 of paint and about six hours of work, we now have the funky, artistic look of an acid-washed concrete floor, complete with control joints.
Pretty cool! You should try it.
















Comments