Do thoughts of holiday entertaining put you on tilt? This article is full of helpful hints and delicious recipes and menu suggestions for stress-free holiday entertaining — allowing you to embrace “home for the holidays” with anticipation and joy.
Let’s begin with a reminder that entertaining and celebrating the holidays is not about a clean house, a perfectly decorated abode or even the food served (family food traditions aside). It is all about the people who will cross your threshold, be they family or friends. Your guests are mainly there to spend quality time with you and the other members of your household.
“Planning a holiday gathering is an act of love and a gift for those you invite and gather,” says seasoned hostess and food writer Anne Willhoit. “Whether you expect to have a houseful or a table-full, with some simple planning and menu selections (and a little bit of discipline), you and your guests can have a wonderful, stress-free time together.”
Preliminary Planning
Decide what kind of gathering will you have and when:
— Open house buffet: Be sure to provide the start and end times and if designated activities — such as caroling, dinner, dessert, games, white elephant gift exchange, etc. — are planned.
— Sit-down brunch, lunch or dinner: Specify sit-down times.
— Invitations: Select a date and time and regardless of whether you’re only inviting family, send out an electronic invite (Evite, Punchbowl, Greenvelope, etc.) so you can track who will be coming (and potentially what guests will bring to avoid too much duplication and understand dietary restrictions) without a lot of back-and-forth texts or phone calls.
Want to make your gathering more eco-friendly? Instead of purchasing paper plates, plastic cups and paper napkins, consider purchasing real plates, bowls, glasses, cutlery, napkins and tablecloths from your local charity thrift shop. This is a win-win for the environment and the charity.
Other tips:
- Use greenery from your own cedar and pine trees and huckleberry, salal and holly bushes for making wreaths and mantle decor or centerpieces.
- Time allowing, make your own veggie and chip dips rather than purchasing them in nonrecyclable containers.
- Clearly label bins for trash, recycling and composting.

Menu Planning
With the gathering format in hand, you can create your entertaining budget and build your menu:
— Try to balance your offerings of proteins, starches, fats and fresh fruits and vegetables. But don’t stress — it’s the holidays, after all, and everyone expects a bit of indulgence.
— Ensure you have a selection of foods for your dietary-restricted guests.
 — Consider your freezer space and what can be made ahead, such as Anne’s lasagna, lentil-potato soup, muffins or Christmas cookies (see QR code for recipes). Many finger foods such as phyllo triangles and baked empanadas can be made in advance, frozen and successfully reheated as your guests start to arrive.
— Consider your refrigerator space to determine what foods can be made or purchased in advance and checked-off your shopping list — such as cheese, cured meats, nuts, dried fruits and beverages (garlic mashed potatoes made two days in advance are fabulous). In a pinch, you can use a laundry room sink, bathtub or ice chests for additional refrigeration space for beverages and hearty items like hams, cheeses, etc. by lining with icepacks or actual ice and throwing a blanket over them to hold in the cold air.
You don’t have to do it all. Delegate things that you want and are comfortable asking guests to contribute. Some examples:
- Beverages
- Foods — savory or sweet; don’t hesitate to suggest recipes
- Ice
- Centerpieces
48 Hours Before Guest Arrival
— Set the table (tablecloths, plates, cutlery, stemware, etc.) or lay out the buffet table with the platters and bowls you will use (put sticky notes in the bowls and platters to remind yourself what goes where).
— Identify food and beverage station locations.
— Rearrange furniture, if necessary, for maximum seating and traffic flow.
— If refrigerator space is sufficient, place beverages in the refrigerator.
— Decide where dirty dishes will be stacked during the gathering (or hire a couple of people to pick up dirty items, load and unload the dishwasher, take out the trash and reload buffet items).
— Designate a person to answer the door and take coats, oversee the beverage table and take out the trash and recycling.
 Four Hours Before
— Fill and run the dishwasher, hand wash, dry and put away hand-washed dishes.
— Put a new roll of toilet tissue on the holder and stock the bathroom with easily accessible toilet paper.
— Arrange flowers or make a centerpiece.
Two Hours Before
— Remove the cheeses from the refrigerator and their wrappers.
 — Empty the trash and recycling in the kitchen and bathroom. Place extra bags in the trash bin for easy replacement.
— Take a shower.
60-30 Minutes Before Guests Arrive
— Turn on the oven for any items that need to be reheated.
— Retrieve chilled beverages from the refrigerator.
— Feed and confine pets to avoid them taste-testing your holiday foods.
— Place appetizers or buffet items out.
Your Holiday Menu
Anne Willhoit has assembled a few sample menus and techniques to keep you calm, motivated and even excited. All recipes can be found in the QR code below.
Here are three ways to simplify:

1. Prepare a breakfast/brunch spread that serves itself.
“If you’re having people pop in at different times or just want to encourage comfortable grazing, consider filling a table with things that can happily wait for hungry eaters. Mix and match homemade with thoughtfully store bought, and it can be easy to pull together,” Willhoit suggests.
Sample menu for a spread that serves itself:
- Pastries, muffins or other baked treats
- Toast basket
- Citrus fruits and crisp apples
- Medium-boiled eggs
- Sliced meats and cheeses
- Granola
- Yogurt nestled in a bowl of ice
- Jams, honey, room-temperature salted butter
- Coffee, hot water for tea and juices

2. Make a big pot of soup to leave on the stove — it’s hearty and flexible.
Lunch and gatherings before a holiday performance (think The Nutcracker) can be hard times of day for meals because people are probably coming and going. A big pot of soup is ideal for this type of gathering, feeding a changeable number of people and keeping well over low heat until you need it.
Having two or three soups ensures that there is a soup that everyone can eat — meat-free, dairy-free, shellfish-free, etc. Think soup is awkward to serve for a stand-up crowd? Try serving it in a coffee mug.
Sample menu for a soup-er lunch:
• A hearty soup like roasted root vegetable
• Crusty breads, sliced
• A salad with legumes like lentil and potato salad
• A leafy salad with some seasonal add-ins such as green salad with roasted squash and goat cheese
 3. A 9-by-13 pan is the ultimate make-ahead hack for a simple and hearty sit-down holiday dinner.
No one wants to eat a meal with a flustered host in residence. Keep calm and feed the masses with something in a 9-by-13. Buy a second one if you have to or make two of the same recipe.
Suggestions:
• Appetizer platter of prosciutto, olives, nuts and cheese
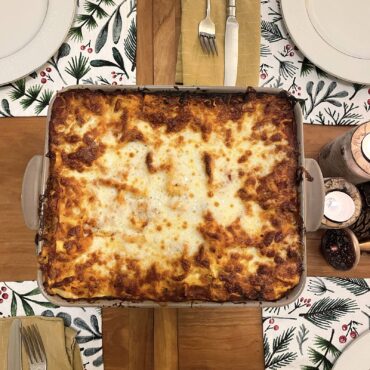
• A simple lasagna or other baked dish
• Shortcut focaccia or any crusty bread
• Leafy green salad or a chopped kale salad
Evening Holiday Buffet
It’s somewhat of an unwritten rule that if your gathering starts after 5 p.m., the food and beverages will be substantial enough for your guests to feel like they have eaten dinner by the time they leave (unless you define your gathering as “nibbles and drinks”). With that in mind, variety is what great buffets are made of. The following are suggestions for both serving and items to include:
 — Always have napkins and salad-size plates on the buffet table — unless there is ample table seating for guests, in which case large plates are preferable. Having plates will minimize people grazing over the table and potentially dropping bits of food into untouched foods. Have plenty of tongs, spoons, cake servers, etc. to allow people to serve themselves without using their hands.
— If you want to give the table some visual interest, use cake stands, inverted bowls or boxes to create a perch for foods at different heights on the table. A napkin can be draped over the box or bowl to conceal it, or you can place the items under a tablecloth before laying out the buffet.
— Order the food on the buffet table with savory choices at one end (meat, egg, cheese, seafood, etc.) and desserts at the other end, with veggies and fruits in the middle.
— For foods that contain mayonnaise or other perishable ingredients, consider chilling the bowl or platter for at least an hour before you fill it with the intended foods.
— Remember trivets for out-of-the-oven foods to protect your table.
 Favorite Buffet Foods
- Thinly sliced marinated and grilled London broil with a smear of creamed horseradish rolled up with a toothpick (can be marinated and grilled a day ahead, sliced day of)
- Thai or Turkish marinated chicken on a stick (marinate the day before and grill two to four hours ahead of guest arrival)
- Crabcakes (can be made the day before the gathering and reheated carefully)
- Deviled eggs (boil eggs and make filling a day ahead and pipe in two hours ahead if they can be refrigerated until the guests arrive)
- Charcuterie boards — fresh fruits, dried fruits, nuts, cured meats and cheeses
- Hot finger foods — phyllo triangles, empanadas, samosas, topped puff pastry, bruschetta
- Dips, chips and crudités — onion dip, crab dip, artichoke dip, humus, sweet red pepper dips plus cut-up veggies, crackers and baguette slices
- Sweets — peppermint-chocolate brownies, sugar cookies, thumbprint cookies, pumpkin cookies
Regardless of what entertaining format you choose, remember to revel in the people you have gathered to celebrate and to have fun.
 Gingerbread Cookies
Makes a very large batch, vegan
Ingredients:
- 1 1/3 cup shortening, room temperature
- 1 cup packed brown sugar
- 1 1/2 cups dark molasses
- 2/3 cup cold water
- 6 cups all-purpose flour
- 2 teaspoons baking soda
- 1 teaspoon salt
- 1 teaspoon allspice
- 1 teaspoon ginger
- 1 teaspoon cloves
- 1 teaspoon cinnamon
Instructions:
With an electric mixer, cream shortening, brown sugar and molasses together until fluffy. Mix in cold water.
Whisk dry ingredients together. Gradually add dry ingredients to wet.
Roll the dough out on a floured surface to 1/2 inch. Cut shapes and place on baking sheet covered with parchment.
Bake at 350ºF for 8 minutes. Cool.
To make glaze:
If you’d like glazed cookies, you can pour it on when the cookies are warm to make a light glaze. Dipping your cooled cookies also makes a pretty effect.
Whisk together and thin with a couple of drops of water, if needed:
- 2 cups powdered sugar
- 1/2 teaspoon salt
- 1 teaspoon vanilla
- 3 tablespoons cream
 Brown Butter Chocolate Chip Cookies
Makes about 2 dozen cookies — easily doubles
Ingredients:
- 1 cup unsalted butter (2 sticks)
- 2 cups all-purpose flour
- 1 teaspoon baking soda
- 3/4 teaspoon kosher salt
- 1 cup dark brown sugar
- 1/3 cup sugar
- 2 eggs
- 2 teaspoons vanilla extract
- 1 1/2 cup chocolate chips
- 1/2-3/4 cup M&M’s
Instructions:
Before you bake, be sure to allow enough time for this first step.
Cook the butter in a saucepan over medium heat for about 5-8 minutes, stirring often until it foams, then browns. Scrape into your mixing bowl and let cool until solid or almost solid.
Whisk flour, baking soda and salt together. Set aside.
With a paddle attachment or beater, cream cooled butter with both sugars for about 1 minute. Add in eggs and vanilla and continue beating until fluffy.
Add in dry ingredients and gently mix. Next, stir in the chocolate and M&M’s.
Drop roughly 2 tablespoons of batter onto a parchment-covered or greased baking sheet. Leave a couple of inches between each cookie to allow for spread.
Bake at 375ºF for 9-11 minutes.
 Brown Sugar Coffee Cookies
Makes 72 cookies (six dozen)
Halve this recipe if you’d like to make a smaller batch. You can also swap in whole wheat flour for half of the all-purpose flour if you’re looking to substitute. These cookies freeze and travel well.
Ingredients:
Cookie:
- 1 cup sugar
- 2 cups brown sugar
- 1 cup butter (2 sticks), unsalted and at room temperature
- 2 eggs
- 1/2 cup milk
- 1 tablespoon vanilla
- 5 cups all-purpose flour
- 1 teaspoon baking soda
- 1/2 teaspoon salt
Glaze:
- 1 1/2 cups powdered sugar
- 2 tablespoons hot, dark coffee
- 1/4 teaspoon vanilla
- Pinch of table salt
Instructions:
Preheat the oven to 375ºF and prepare your baking sheets with parchment paper (or by greasing).
Slice the butter into pieces and add, with the sugars, to the bowl of an electric mixer. Cream with the paddle or beater attachment until the mixture is soft and fluffy. Add in the eggs, milk and vanilla gradually.
In a separate bowl, mix flour, baking soda and salt. Mix gently into the batter.
Using a cookie scoop or spoons, create balls that are about 1 1/2 inches. Place on the baking sheet a few inches apart. (This cookie doesn’t spread very much.)
Bake 10-12 minutes at 375ºF.
Make the glaze by whisking the ingredients together in a measuring cup with a pour spout. If it begins to harden up at any time, drip in a little more coffee and stir again.
After the cookies are baked, slide them onto a wire rack that is set on another baking sheet. (This catches the glaze drips for easy cleanup.)
When the cookies are cool to the touch, drizzle the glaze over the top. Create stripes or whatever pattern pleases you. Let cookies dry before packing them up.
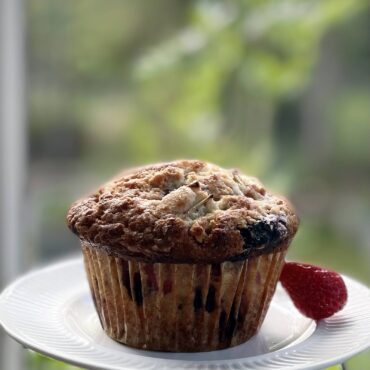 Any Berry Surprise Muffins
Makes 12-14 muffins
A blackberry muffin in the morning is a decadent way to celebrate the height of our summer’s blackberry season, isn’t it? For a few weeks, these intrusive vines become our best friends, gifting us with ripe for the picking treats. I try to save a few pickings to freeze for glum winter days. My trick is to spread them out on a lined baking sheet, freeze for an hour and then bag them in labeled amounts. With this technique, I can scoop out what I need and make this cheerful muffin all year.
This muffin can stand well on its own, so if you want to go easy, skip the sweet, cheesy center and crumble topping. Begin with step five, and watch for a few minutes’ shorter baking time.
Ingredients:
- 8 tablespoon unsalted butter, room temperature
- 1 cup sugar
- 1/2 teaspoon salt
- 2 large eggs
- 2 cups all-purpose flour (plus 1 tablespoon for fruit)
- 2 teaspoon baking powder
- 2 cup berries, fresh or still frozen
- 1/2 cup buttermilk
Cheese filling:
- 8 ounces cream cheese
- 1/4 cup sugar
- 1 teaspoon vanilla
Crumble topping:
- 4 tablespoons butter
- 4 tablespoons sugar
- 8 tablespoons flour
Instructions:
Place paper liners in your muffin pan and preheat the oven to 375ºF.
Toss the fruit with 1 tablespoon of flour.
Make the cheese filling. With a fork, mash the cream cheese, sugar and vanilla on a plate or cutting board. Finish incorporating it with your fingers, then divide into 12 rough shaped balls.
Make the crumble topping. First, melt the butter in a small saucepan over low heat, then fork in the sugar and flour. Set aside to cool.
Begin the muffin batter. Cut the butter into pieces and, using an electric mixer with the paddle attachment, cream with the sugar and salt until it is light and fluffy.
Continue to beat and add eggs, one at a time. Add flour and baking powder. Add the buttermilk.
By hand, fold in the fruit gently with a rubber scraper.
In each muffin liner, spoon about 2 tablespoons of batter. Place a cream cheese ball in the center of the batter. Then, spoon about 2 more heaping tablespoons of batter over the top, covering the ball.
Squeeze and sprinkle on the crumb topping. Press the crumbs down very gently on each muffin.
Spoon into the muffin cups and bake at 375ºF for 30-35 minutes until pleasantly brown.
Rest for 5 minutes, then remove from pan to cool on rack. (Leaving muffins to cool in the tin too long makes them rubbery.)
Variations that are wonderful: blueberry (with a little bit of nutmeg), strawberry, chopped rhubarb, peach and almond extract. Add cinnamon or your favorite spice.
Classic Medium Egg
Makes as many eggs as you’d like
A little softer than a hard-boiled egg and fun to eat, a medium egg is a fantastic buffet staple. It looks beautiful and appeals to most.
Instructions:
Prepare an ice water bath. Choose a bowl that will amply contain the amount of eggs and fill with iced water.
Bring a tall pot of water to boil. With a slotted spoon or similar tool, lower the eggs into the water. Time them at exactly 7 minutes. Remove to the ice water bath.
Refrigerate until needed.
To serve, tap bottom and remove shell carefully with a spoon. Slice in half and sprinkle with a coarse salt.
Hearty Lentil and Potato Salad
Serves 4-6
This lovely salad is a great protein boost and can be served warm or at room temperature.
Ingredients:
- 1 cup green French lentils
- 4-5 medium potatoes, cut into 1 inch cubes
- Half of one onion
- 1 clove garlic
- 1 bay leaf
- 1/2 cup fresh parsley, chopped finely
- 2 tablespoons olive oil
- 2 tablespoons sherry vinegar
- 1/2 teaspoon salt
- 1/8 teaspoon black pepper
- 4 strips bacon, cooked (optional)
Instructions:
Fill a medium pot and bring to a boil on high.
Wash, peel and cut the potatoes, removing eyes or any sprouts. Cube into about 1-inch pieces. Boil for 20 minutes in salted water. Drain the potatoes and set aside in a bowl big enough to hold the potatoes and a little extra.
Rinse lentils and add to about 3 cups of water. Add half of an onion, one clove of garlic and one bay leaf. Bring to a boil, then reduce heat to low and simmer for about 25 minutes. Drain. Discard the onion, garlic and bay leaf.
Add the lentils to the potatoes.
In a small bowl, combine oil, vinegar, sparsely, salt and pepper to make a dressing. Pour this dressing over the potatoes and lentils. Crumble in bacon.
Roasted Root Soup
This simple soup is really good on any cool day, regardless of the time of year. It’s one of those recipes that is versatile and can fit in as a dinner party appetizer or be the whole meal on a busy, family day. It’s a low-effort recipe with a high-brow taste.
Ingredients:
- 1 pound carrots
- 2 medium potatoes
- 1 large onion
- 5 garlic cloves
- 2-4 tablespoons olive oil
- Salt and pepper
- 1 bay leaf
- 2 thyme sprigs
- 1 quart chicken or vegetable stock
- 1/2 cup cream
Fun, optional topping ideas:
- whipped unsweetened cream
- sour cream
- toasted nuts
- popcorn
Instructions:
Preheat your oven to 425ºF. For easy cleanup, cover a baking sheet with parchment paper.
Peel and cut the carrots into chunks. Wash potatoes. Leave skins on and cut potatoes into similarly sized chunks. Peel onion and quarter. Toss all of these veggies on the baking sheet with the olive oil and season with salt and pepper.
Peel garlic cloves, leave whole and set aside.
Place the baking sheet in the oven to roast for 1 hour. Halfway through the baking time, toss the garlic cloves in the middle of the sheet and roast with the vegetables for the remaining hour.
When the vegetables have finished roasting, pour them into your soup pot with the water or stock. Add the bay leaf and thyme. Cover and simmer for about 20 minutes.
Fish out the bay leaf and thyme stems. Using an immersion blender or standing blender, puree the vegetables until smooth. Thin with a little extra water, if needed.
Top as you like.
Notes:
- Do you have an immersion blender? This tool is an easy way to make smooth, blended soups. Of course, a standing blender will work as well. Be sure to mind the heat and allow for ample headspace when blending. Hold the lid on with a folded washcloth to avoid splatter.
- In a pinch, you can make this recipe using water in place of stock. Increase the amount of herbs and seasoning to taste.
Enjoy warm or cold.
Shortcut Focaccia
This is a simple bread that can fit nicely into your schedule. Make it ahead of time and let the dough sit on the counter until you’re ready to bake.
This dough is forgiving or flexible. If you bake it in an oiled cake pan, it turns out thick and spring. You can also choose to spread it thinly, gently shaping the dough into a rough rectangle shape on a baking sheet. This bakes up thin and crispy and, when sliced into matching squares, makes for really great sandwiches. Enjoy it hot and crispy right out of the oven.
Ingredients:
- 3 cups all-purpose or bread flour
- 1/2 teaspoon salt
- 1/2 teaspoon sugar
- 2 1/4 teaspoon instant yeast
- 1 cup plus 2 tablespoons water
- 1 tablespoon olive oil plus extra for pan
- Coarse salt and pepper for sprinkling
Instructions:
In a bowl, mix the dry ingredients. By hand or by machine with a dough hook, mix in the wet ingredients, pouring the oil in after the water. Knead until the dough is smooth, another 5 minutes.
Cover with a towel. Set aside to rise in a warm place for about 60 minutes.
For a thick bread, drizzle a bit of olive oil in a 9-inch round cake pan. Gently spread the risen dough in the pan, flipping it once to coat both sides with oil. Cover and let rise for about 20 more minutes. Dimple with fingers and spread again if needed. Sprinkle with coarse salt and pepper.
For a thin, cracker-like bread, drizzle olive oil onto a baking sheet and use fingers to spread it out. With oiled fingers, take the risen dough and gently spread it on the pan. Spread a little more olive oil on the top and dimple the dough with your fingertips. Cover and let rise for another 15-20 minutes. Sprinkle with salt and pepper.
Bake on the lowest rack in your oven at 400ºF for 20-25 minutes or until a nice brown.
Topping options before the bake: coarse salt, pepper, red pepper flakes, thinly sliced and oiled onions, dried herbs.
Topping options after the bake: chopped fresh herbs, Parmesan or other finely grated cheese.
Simplified Lasagna
Serves about 8
This is an easier way to make a lasagna and is a choose-your-own adventure. Sauté sausage and add these crumbles for your meat-eaters or leave it out for your vegetable-forward folks. How about doubling the ingredients and making one of each?
Ingredients:
- 1 9-ounce box of no boil lasagna noodles
- 1 cup ricotta
- 1 onion
- 2 cloves garlic
- About 8 cups green vegetables* (broccoli, chard and spinach are a nice combination)
- 1/3 cup white wine
- 16 ounces mozzarella
- 1/2 cup Parmesan
- 1 1/2 cup milk
- Olive oil, salt, pepper
* After cooking, you should aim to have 4 cups cooked down vegetables.
Instructions:
Rub room-temperature butter on the inside of a 9-by-13 pan. Preheat oven to 400ºF.
Prepare the vegetables and group by cooking time on your cutting board. Chop the onion roughly. Remove the chard stems and chop separately. Cut the broccoli florets and the stems separately. Rough cut green leaves. Coarsely chop the garlic.
You’ll want to sauté the vegetables, beginning with the ones that need more cooking time and ending with the delicate leaves. Stir between each addition and add salt and pepper while cooking. Drizzle oil in a pan set over medium low. When the pan is hot, begin with the onion. Cook until soft, about 5 minutes. Add the broccoli stems and chard stems. Next, add in the florets. Lastly, add the leaves and garlic. This combination of vegetables takes about 20 total minutes.
At the very end of the vegetable cooking time, add in the white wine. Stir and let bubble for about 1 minute. Take vegetables off heat and set aside to cool.
With a food processor or by hand, coarsely grate the mozzarella. Finely grate the Parmesan. Set aside.
Measure out your milk. Set aside.
Pulse the cooked vegetables in the food processor about four times. Add in half of the ricotta and pulse until almost smooth. Separately, add salt and pepper to the plain ricotta.
Time to layer. Begin with a little milk in the bottom of the 9-by-13 pan. Follow with noodles, milk, plain ricotta, grated cheese, noodles, milk, vegetable/ricotta mixture, grated cheese, noodles, grated cheese. Poor the remaining milk all over the top.
Seal with foil and bake at 400ºF for 35 minutes. Remove the foil and bake for 10 additional minutes or until desired browning on the top has been achieved.
Roasted Squash and Walnut Green Salad
Serves about 4. Scale up as needed.
Pretty to look at with the bright colors of the squash and the green of the lettuce, this salad will cheer up your fall or winter table.
Ingredients:
Salad:
- 2 delicata squash
- Leafy greens
- About 1 cup whole walnuts
- Dried cranberries, to top
- Crumbled goat cheese, to top
Dressing:
- 3 tablespoons walnut oil
- 1 tablespoon sherry vinegar
- 1 teaspoon maple syrup
- Pinch of salt
Instructions:
Dressing:
Prepare the dressing by shaking all of the ingredients in a jar.
Dress the salad as you like and save the rest of the dressing, if any is leftover, at room temperature.
Salad:
Turn your oven to 425ºF. As it preheats, toss the walnuts on the baking sheet that you’ll be using for your squash and put in the oven. Remove the nuts after about 10 minutes (or when they begin to smell nutty.) Set aside to cool.
While your oven heats and the nuts toast, prepare the squash. Halve it longwise and remove the seeds with a spoon. Slice off each end and discard. Slice the squash into equally sized rings.
Toss the squash rings in olive oil and dust with salt and pepper. Spread evenly out on a baking sheet and roast at 425ºF for about 45 minutes.
Assemble your salad when your squash has cooled. Lightly dress your greens and pile on the squash, cranberries, nuts and cheese.
Sweet and Salty Granola
Enjoy this granola in the morning or as a snack. It will store in a sealed container for quite a long time. Using a scale for this recipe helps you to nail it every time. Tare, returning the scale to zero between additions, and you won’t even have to do any math.
Instructions:
In a large bowl, weigh:
- 400 g rolled oats
- 200 g buckwheat groats
- 500 g any combination of nuts and seeds (sunflower seeds, sliced almonds, pumpkin seeds or whatever you like)
Mix well.
Pour in:
- 1 cup maple syrup
- 2/3 cup olive oil
- 1 teaspoon vanilla
Mix until the dry mixture is completely moistened.
Spread the mixture onto a parchment lined baking sheet. Sprinkle a total of 2 teaspoons of flaky sea salt or kosher salt over the top.
Bake at 375ºF for 25 minutes, stirring twice during this time.
Cool and store as is. If you like, when the granola is cool, mix in dried fruits or other add-ins. (Golden raisins, cranberries and dried apples are delicious.)


