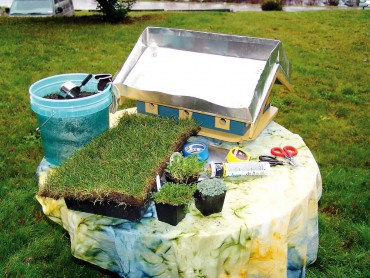
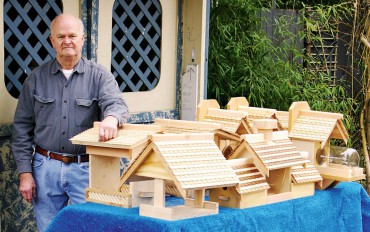
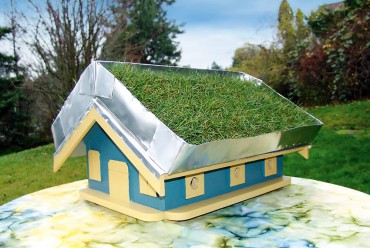
 Buildings with a “living roof” are all the rage with the current focus on ecologically minded construction techniques. Originally European and historically planted with turf grasses, green roofs are popular worldwide for reducing pollution and runoff and improving insulation, among other environmental benefits.
They are commonly seen in commercial construction but now you, too, can have a green roof. Use sod or plants with ground-covering form to build a fun garden ornament your neighborhood birds will also enjoy.
Building a Green Roof Birdhouse
- Any size birdhouse or feeder with as flat a roof as possible
- Sheets of aluminum flashing
- Silicon sealer or “Maxbond” glue
- Grease pencil or indelible ink pen
- Tin snips
- Short nails or brads, screws and washers
- Tin punch
Directions:
Purchase a birdhouse with the flattest pitch roof you can find. If you’re handy, make your own with flat or slightly pitched roof.
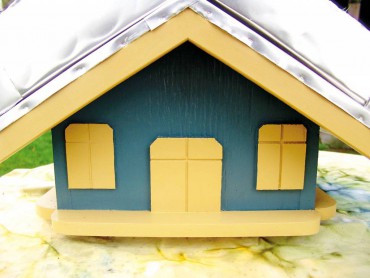
Cut one sheet of aluminum flashing to fit over entire roof and extend beyond lower sides of roofline by 1/4-inch to help drain any water away from the eaves. If pitched, crease the metal at the peak so flashing lays flush. Secure smoothly with small nails or brads.
Create “planting trays” on top of roof using sheets of aluminum flashing. Measure the roof to determine what dimensions the base of the trays should be. A flat roof will require a single tray; a pitched roof, two. For a pitched roof, the bottom of each tray will match the width and length of one roof side.
The depth of the tray should be about 4 inches. The weight of the planting tray needs to be supported and not hang over the edge, so the footprint of the tray should be slightly smaller than the roof itself.
Mark the length and width of the tray base on aluminum sheet with a permanent marker or grease pencil with a straight edge. Center the dimensions on the sheet so that 6 inches or more of material is available on all sides for folding up to make the sides. Allow 4 inches for the side plus 2 inches to fold down inside the tray to hide sharp edges. Once the tray base is marked, straight folds are made by bending over a solid, straight edge such as a table. Cut the metal at the corners with tin snip to fold into a box. Folding the top edges over toward what will be the inside of the tray before folding up the sides is easiest. It is harder to fold the top edge cleanly once the sides are folded up. Leave the one side of the two trays where they will meet at the peak of the roof unfolded.
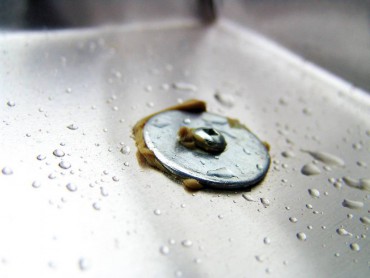
Mount trays to roof using four to six well-spaced screws with washers. Placing a dab of silicon or wood glue under the washer will create a waterproof seal. Once trays are mounted, fold down the edge of one tray over the other at the peak to secure them together. Silicon or wood glue under the folds of the metal, especially at the corners of the trays, adds waterproofing. Figure 1
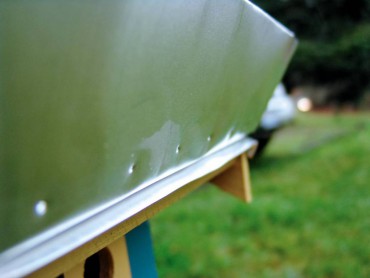
Poke drainage holes at one-inch intervals along the lower side of each tray about 1/2-inch up from the roofline. Any water that doesn’t drain cleanly out of the hole should drain off the edge of the flashing. Figure 2
Planting a Green Roof Birdhouse
Materials:
- Pre-moistened planting mix: 80 percent yard waste compost and 20 percent sand if using sod or regular potting mix for groundcover plants
- Sod cut to fit planting tray or groundcover-type plants in 4-inch pots
- Watering can with rose or adjustable trigger sprayer
- Sheet of cardboard to cover top of planting tray
- 2-inch-wide masking or packing tape
- Gloves
Directions:
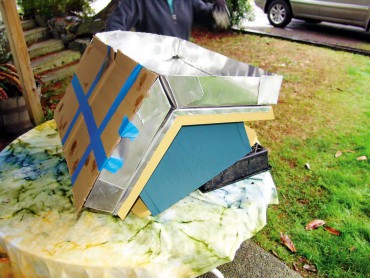
Tilt birdhouse on the side with support underneath so that first planting tray is flat. Figure 3
Whatever plants or potting mix used, make sure the plants are well-watered first and the planting mix is thoroughly dampened. Figure 4
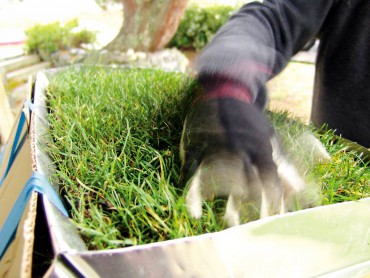
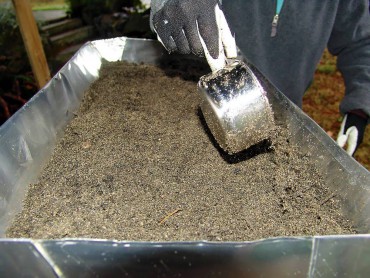
For sod, scoop planting mix into tray and tamp down evenly. Plant sod so that it sits at least 1/2-inch below the top edge of tray so that water will not easily run over the top when irrigated. Lay sod into tray and gently press down to reduce gaps between it and the planting mix. Figure 5
For ground covers in 4-inch pots, remove from pots and set into tray at intervals that will allow the plants to grow together fairly quickly. Start by placing first row of plants directly along what will be the lower edge of the tray so that they will hold up the loose soil above them and prevent it from spilling out. Fill in tightly between plants with potting mix and tamp down gently so the tray is planted snugly and won’t shift when roof is angled.
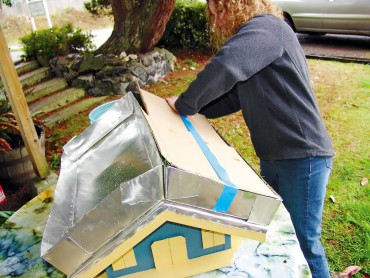
Cut a piece of cardboard to fit tightly over the planting tray and tape in place so that when the birdhouse is tilted the other direction, plants and soil tumble out. Figure 6
Carefully tilt the birdhouse the other direction, placing a support underneath so second tray is flat, and repeat the procedure as before.
Place birdhouse right side up and remove cardboard from the side. Water gently, starting from the peak of the birdhouse down using a watering can with a rose or watering wand on “shower/rain” setting, applying only a small amount of water at a time. Excess water should drain cleanly out of bottom drainage holes. If water flows over side, apply it more slowly and consider adding more drainage holes. Figure 7
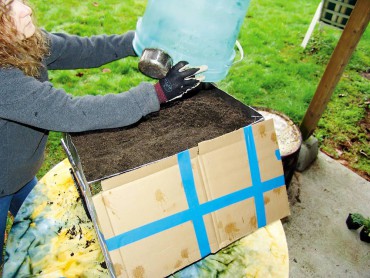
Allow a month or two before mounting the birdhouse in a permanent location, especially if intending to pole-mount. That way, you can evenly and easily water the plants to get them well rooted, which will bind the potting mix together and make plants less likely to shift when mounting the birdhouse later.
If post-mounting, keep in mind that the birdhouse, with well-watered soil and plants, will be heavy. Take care in using a strong, sturdy post set in concrete and have help in keeping birdhouse level while raising and mounting.
Maintenance
Regular watering will be necessary through summer, more for sod and less for some ground-covering plants like sedums. Placing the birdhouse where it gets morning sun is recommended so plants in shallow potting medium won’t dry out as quickly as in strong afternoon sun. The edge of the planting tray will be hidden as the plants grow and drape over edges, creating a rustic, homey setting for any bird. If sod is used, a trimming with a handheld grass shear every now and again should keep it looking tidy.
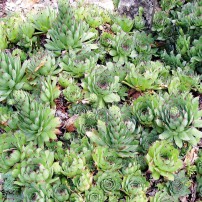
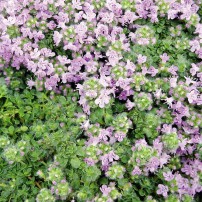
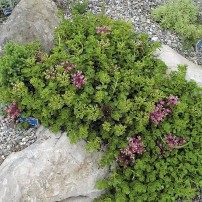
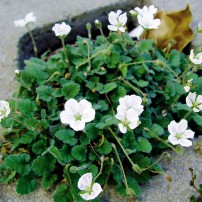
Some Groundcover Plants for Living Roofs
(Photography below courtesy Stepables®)
This article was first published in the Winter of 2009 print edition of the WestSound Magazine. Any discrepancies, omissions, or inclusions that seem incorrect are purely due to the age of this article. WestSound Magazine deemed this article useful and beneficial as a contribution to today's readership, and therefore is included in this site's online article archives. If you feel the content of this article is detrimental due to its age, please feel free to contact us to request removal or modification.


