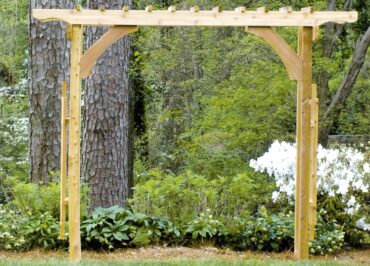
 Are you dreaming about beautifying the backyard? Is your garden in need of some color and dimension? If you have the tools, a free weekend and the initiative, you can add charm and beauty to your outdoor space by building a garden trellis.
Here’s everything you need and everything you need to know to complete this “Done-In-A-Weekend Project” from Exmark, a leading manufacturer of lawn care equipment.
Tools:
- Table saw
- Circular saw
- Jig saw
- Orbital sander
- Drill/driver and bits
- Tape measure
- Pencil
- Sawhorses/worktable
- Eye and ear protection
Materials:
- (3) 2-inch by 4-inch by 8-foot cedar
- (4) 4-inch by 4-inch by 8-foot cedar posts
- (2) 2-inch by 8-inch by 8-foot cedar (for the corbels)
- (1) 2-inch by 6-inch by 6-foot cedar (side bracket/beam support)
- (2) 2-inch by 6-inch by 10-foot cedar beams
- (4) post brackets (optional, to attach to wood deck)
- 2.5-inch deck screws
- 1.25-inch deck screws
- Wood stain
- Wood sealer
- Wood glue
Instructions:
- Cut boards down to size for the sides, top trellis and corbels (if you’d like more detailed cut list, download complete instructions)
- Assemble the side sections.
- Assemble the top trellis section by following the template found at backyard.exmark.com or by sketching your own design onto card stock.
- Attach the top and sides of the trellis, ensuring the sections are square with one another.
- Use the template to build the corbels.
- Line corbels flush with the side posts and attach.
- Apply wood sealer, then stain or paint (if desired).
To download the complete instructions and template, and to follow along with the video tutorial, visit Exmark’s Backyard Life site, a multimedia destination providing homeowners with everything from grilling tips to gardening advice.
While this beautiful trellis is a bit of work, once complete, it can provide structure for vining plants to grow, create a bit of shade from the harsh summer sun or simply serve as a point of architectural interest in your garden.


