 Copper has been trending in the interior design world, and from the looks of it, I don’t think it’s going away any time soon. It adds the perfect industrial accent to compliment any space. Want to incorporate a fun metal DIY candelabra in your home? Here’s an easy and affordable way to add some copper in your space.
DIY Candelabra
Supplies:
- 4 copper-pipe 3/4-inch elbow fittings
- 3 copper-pipe 3/4-inch tee fittings
- 3 3/4-inch taper candles
- Super glue (or Gorilla glue), optional
Directions:
Before you begin, clean off your copper pipes the best you can. If you found your pipes at a local hardware store, they may have adhesive stickers you’ll have to remove.
 There are a few methods to cleaning copper using common household products — you can rub it with half of a lemon and sea salt or you can soak it in alcohol.
Once the pipes are clean enough, begin to design them in the configuration you want your candlestick holder to be. The options are endless! If you have the right size candlesticks and fittings, the candlestick should fit into either the top of a tee or the top of an elbow, depending on your design.
For the one that I made, I switched between elbow fittings and tees, alternating the direction that the elbow fittings faced. This gave it a “zig-zag” feel. I made sure to put an elbow fitting on either end of the piece to better stabilize it.
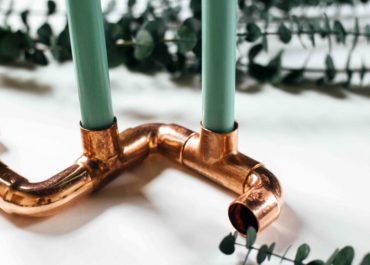 Once you’re happy with your design, you can choose to glue it or not. I definitely recommend gluing it if you are planning to light the candles, as you would be in trouble if a lit candle fell over.
However, if you use strong glue, like Gorilla glue or super glue, the design may not come apart. Another option, if you have the resources, is to solder the pipes together. With this method, you can take the pipes apart later, but it does require more supplies (and perhaps help from a friend).
Final step: Admire your new DIY candelabra!


