 Editor’s note: This is an excerpt adapted from the book “Modern Pressure Canning,” recently released by Quarto Publishing Group USA Inc.
The glass clinks gently in the hot, soapy water as I wash my jars for this year’s canning. Sitting on the counter are colanders full of tomatoes and peppers that need to be saved for the winter. Although canning involves plenty of work, it’s something I look forward to every year. Just like cooking dinner, the work is rewarding because of the taste: There’s nothing better than opening a jar full of flavor in the middle of winter.
Pressure canning puts the power of food preservation at your fingertips. Whether your inspiration is the farmers market or a treasured family recipe, you can preserve it. Pressure canning lets you preserve the foods you and your family like to eat so you can enjoy them at their peak year-round.
It’s great for the spontaneous cook who likes to have a variety of ingredients to work with. It’s also wonderful for those who want convenience without sacrificing health benefits or taste.
Unlike store-bought canned food, there are never any preservatives or questionable ingredients in home-canned food. And you simply can’t beat the taste and texture attainable when home canning.
Pressure Canning Vs. Water-Bath Canning
Pressure canning and water-bath canning are similar in that they are both ways to preserve food in your own kitchen. The general process of putting food in jars, attaching lids, heating to seal and storing are the same.
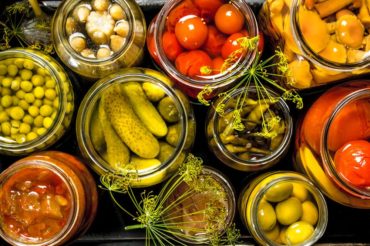
 However, there are some major differences you should know. All foods have natural acidity levels. Many fruits and tomatoes are highly acidic. These foods can be water-bath canned. Or, take pickles: cucumbers (a low-acid food) in an acidic pickling solution. These can also be water-bath canned.
Water-bath canning, or hot-water canning as it’s sometimes called, is the method of submerging filled jars into hot water and boiling for a specific period of time. This means the internal temperature of the food in the jars is heated to 212 degrees.
It’s a great way to start canning, and the most common way to make popular pantry items such as jams, jellies and pickles. However, to get a wider range of foods in jars, you need to learn the art of pressure canning.
Pressure canning is the preserving method by which filled jars are placed into a large pot with just a few inches of water in it. A locking lid is placed on the pot and steam develops inside the pot. The jars’ contents reach an internal temperature of 240 degrees under a specific pressure, and the recipe states a specific period of time to hold that pressure.
Pressure canning can be used for a wider variety of foods. You can process vegetables and fruits with low or high acidity, meats, poultry, fish, sauces and even whole recipes such as soups or stews. Pressure canning generally means less mess, and my jars always seem to seal when I pressure can.
(I also admit some bias — I love canning meat. On our farm, we raise much of our own meat, and being able to process it myself means I can fill my pantry with healthy food that has been raised ethically.)
Pressure canning, as you might expect, is done in a pressure canner. A pressure canner is a large pot designed specifically for the canning process; do not confuse a pressure canner with a pressure cooker.
A pressure cooker is very useful, but it’s a different piece of equipment meant for general cooking. Although there is some crossover, and electric pressure cookers can be used to can a couple of jars at a time, they are two distinctly different kitchen items with similar names.
Pressure Canning Basics
Canning is a method of food preservation that requires common sense. You can play around with ingredients, invent new recipes and even make artistic labels that wow your friends, but cleanliness and organization are the keys to germ-free jars of food.
The most important rule for pressure canning is keep the process clean and simple. This means keeping the work area and equipment as clean as you possibly can. You should also avoid nonstandard jars and any clutter — such as jar decorations — until after the food is ready for the pantry. You want as tidy a workspace as possible, especially as you’re just getting started.
Other important things to consider when planning for canning:
- Start in the garden: Grow what you like.
- Choose your ingredients wisely — freshest and ripest.
- Know the proper steps to canning.
- Prepare and pack the right way.
- Use reliable, tested recipes.
- Update your canning knowledge.

Stewed Tomatoes
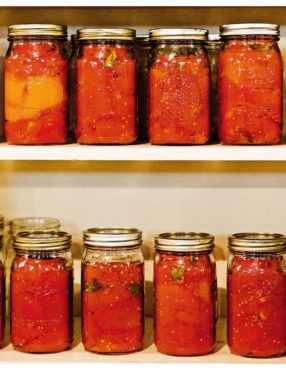
On a cold night on the farm, one of our favorite comfort foods is a simple meal of hot, stewed tomatoes and buttered noodles. We pan-fry some extra onions and peppers to go with the onion and pepper in these tomatoes, but, otherwise, the jarred goodness carries the meal.
I’ve found my family doesn’t much notice the skin on the tomatoes once they’ve been canned, but if you want to remove the skins before canning, it’s easy enough. Simply dip the tomatoes in boiling water and immediately transfer them to an ice-water bath. The skins will peel off easily.
Processing time: 15 minutes | pressure: 10 pounds weighted gauge, 11 pounds dial gauge
Yield: 4 pints
Ingredients:
- 12 to 14 large tomatoes, quartered
- 1/2 cup roughly chopped onion
- 1/3 cup roughly chopped green bell pepper
- 2 tsp sugar
- 1 tsp canning salt
Instructions:
Prepare four pint jars and the canner: Clean the jars and prepare the two-piece lids according to the manufacturer’s guidelines. Keep the jars in hot but not boiling water until you’re ready to use them. Prepare the canner by filling it with 2 to 3 inches of water and bringing it to a simmer, or according to your manufacturer’s directions.
In a large pot over medium-high heat, combine the tomatoes, onion and green bell pepper.
Add the sugar and salt, stirring to dissolve. Bring the mixture to a boil and reduce the heat to a simmer. Cook for 15 minutes, stirring often to prevent burning.
Carefully fill the jars with the hot tomato mixture, leaving half inch of headspace.
Remove any air bubbles with a plastic or wooden utensil, adding more tomatoes or liquid as needed to maintain the proper half-inch headspace.
Wipe the rims and seal the jars hand-tight with the two-piece lids.
Carefully transfer the filled jars to the rack inside the pressure canner. Process the jars at the pressure listed above for 15 minutes.
Let the canner return to 0 pounds pressure. Wait 10 minutes more, then carefully open the canner lid according to the manufacturer’s instructions.
With a jar lifter, remove the jars and place them on a clean dishtowel away from any drafts. Once the jars cool to room temperature, check the seals. If any jars have not sealed, refrigerate them and use the tomatoes within two weeks. Label the remaining jars with the recipe name and date before storing.


